Wednesday, June 25, 2008

Wheat bread with millet

As I said in my last post, a good stew is so much better with a hearty bread. I've been cooking breads from the Bread Bible for about two years, and have started to experiment with variations of my own (I have a hard time keeping to recipes for very long). Overall, this bread was a moderate success. I made a much larger bread than I'd expected, and because I didn't account for this, I didn't put in enough millet to really have it stand out (it is easy to add too much, so I erred on the light side).


and a closeup...

it sure does look good...

Wheat bread with millet
Ingredients:
1-1/2 cup warm water
2 tbsp. yeast
1 cup whole wheat flour
1-1/2 cups unbleached, whole purpose flour (very approximate)
2 tbsp. wheat gluten
2 tbsp. millet (not enough)
1 tbsp. butter, melted
3 tbsp. dry milk
2 tbsp. honey
1 tbsp. salt (I forgot to add this!!!)

Directions:
  • Proof yeast in warm water with honey and a dusting of flour
  • Add millet, butter, dry milk, salt, wheat fluten, whole wheat flour, and 1 cup regular flour and mix
  • Add remaining flour while stirring, until sticky dough forms
  • Knead dough, adding flour as needed to prevent from sticking to your work surface (I used silicon baking mat because it's easy to clean and does not move around while kneading)
  • Let dough rise (covered with loose plastic wrap) in a greased bowl for 1-1/2 hours (give or take)
  • Deflate dough and work into desired loaf shape
  • At this stage, it is good to fold the dough onto itself several times to create an internal structure that will support the loaf
  • Place loaf onto pizza peel sprinkled with corn meal, cover loosely with plastic wrap
  • Let dough rise another 30-60 minutes
  • Slash surface of dough, brush surface with egg glaze (1 egg beaten with 2 tbsp. water)
  • Transfer onto a baking stone in a preheated 450° oven, reduce heat to 400°
  • Bake until done, 30-40 minutes (loaf will south hollow when tapped)
  • Let loaf cool (at least slightly :) ) and serve

Savory Venison Stew

I definitely love my home style foods - stews, pot pies, roasts, and hearty breads, just to name a few. Unfortunately, fall and winter are the domain of these foods, and here we find ourselves in early summer. However, because Z and I will be moving to Texas next month (well, our stuff and I will be moving then, Z will follow later), we really need to empty out the deep freeze (apparently movers don't like putting freezers full of food into very hot semi trucks). So, we decided to use up our venison on a favorite stew of ours, invited over some friends, and made sure we had a good bottle of wine to go with it.

Now, I know I stated with a recipe for this stew, but I haven't looked at it in years, and it varies greatly from stew to stew, depending on what we have around the house, who is coming over for dinner (our friend "J" doesn't like mushrooms), and whether I'm feeling like a little adventure.

This time, I had some grape tomatoes laying around that were starting to get too wrinkly for salads, so I threw those in. I would recommend slicing them in half if you're going to use cherry/grape tomatoes - in their whole form, even after cooking for 2 hours, they were basically little boiling hot liquid bombs that burned the inside of your mouth every time you bit into one. Also, check out the cast iron dutch oven. Z found this little gem at Ikea, for about a quarter of the price of Le Creuset. Granted, I've never used Le Creuset to know if I'm giving up a lot on quality, but I have to say we've already gotten a lot of use out of the pan, and haven't been disappointed yet.

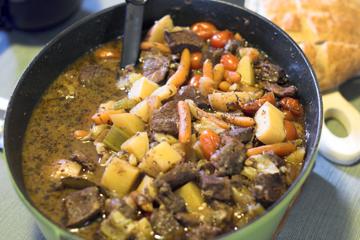
Doesn't this stew just scream "eat me!"?

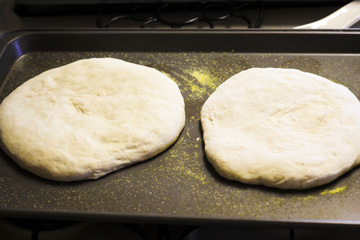
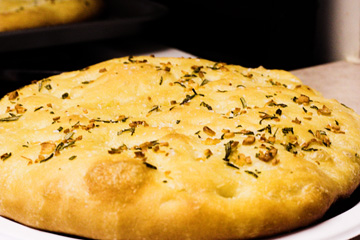
As you can see in the background, there was also a fresh loaf of homemade bread involved. That recipe will follow in my next post. Until then, here's the venison stew recipe...

Savory Venison Stew
Ingredients:
3 tbsp. flour
3 tbsp. olive oil
2 - 3 lbs venison, cubed (can also use beef)
1-1/2 onion, cut into large chunks
3 stalks celery, cut into large chunks
3 cloves garlic, minced
1/2 lb carrots, cut into large chunks
4 large potatoes, cut into large chunks
1/2 lb mushrooms, halved
2 tomatoes, diced
4 cups beef broth
1 cup red wine
lots of herbs and spices

Directions:
  • Toss venison with flour and powdered spices (salt, pepper, onion powder, garlic powder, paprika, etc. - use your imagination - you could add cumin for a southwest stew)
  • Heat olive oil in a heavy stock pot or dutch oven, and brown meat (in batches if necessary). Remove meat from pot when browned.
  • Add onion, garlic, and celery and saute for several minutes
  • Add in dried herbs (e.g., basil, rosemary, bay leaf, oregano, marjoram, thyme, etc. - again, there's room for creativity here - use what you have)
  • Saute for several minutes more, and then deglaze the pan with red wine
  • Add the venison back in, along with carrots, potatoes, mushrooms, and tomatoes.
  • Add beef stock. Salt and pepper to taste (can add more as cooking continues)
  • Cover pot and simmer on low for 90+ minutes, until meat is tender and you're ready to serve.
  • note - if you prepare this in a dutch oven, you can "simmer" it in your oven at 300° instead of on the stove top.
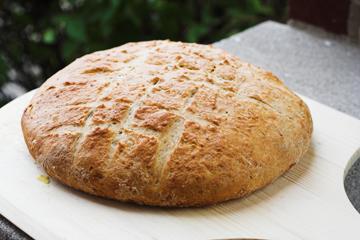
Thursday, June 12, 2008

Black Raspberry (part II)

A little bit ago I posted the black raspberry - a drink featuring framboise lambic and Guinness. I just wanted to post a quick note saying we made these again, this time using the Lindeman's lambic. It was much better with the Lindeman's (not that it was bad with the other brand), so if you decide to make them yourself, it is worth going with the sweeter lambic.

Wednesday, June 11, 2008

Crash Hot Potatoes

I saw this recipe on Pioneer Woman, and thought it looked absolutely delicious. Last night, we tried these for the first time and were VERY happy with how they turned out. They take a bit more time than other potato preparation methods, but they are well worth it. The recipe basically involves cooking the potatoes, crushing them on a baking pan, and then seasoning and baking them.


In all honesty, this isn't a huge departure from how we often cook potatoes - by dicing them, tossing them in olive oil and seasoning (often times salt, pepper, and rosemary), and then baking them. But, the pre-cooking and subsequent mashing seems to add a lot to the texture of the dish.

Crash Hot Potatoes
recipe from Pioneer Woman

Ingredients:
Potatoes (small/medium size)
Olive oil
Kosher salt
pepper
rosemary

Directions:
  • Boil potatoes in salted water until fork-tender
  • Coat a baking sheet with olive oil
  • Place potatoes on baking sheet and crush with potato masher (we don't have one, so I used a large serving fork)
  • Brush potatoes with more olive oil
  • Liberally salt and pepper the potatoes, sprinkle with chopped rosemary
  • Bake at 450° for 25-minutes

Saturday, June 7, 2008

Blueberry Corn Muffins

A few months ago, Z found a recipe for "individual blueberry cakes" in Family Circle magazine. We tried these once, and thought they were delicious. Then, we tried them again, and again, and again (just to be sure), and still feel this way. They're a remarkably easy "semi-homemade" dessert that starts with a box of cornbread mix. We bake them in muffin tins...


and then flip them over to serve.


We usually dust them with a little powdered sugar and occasionally some whipped cream (when we have some).

Blueberry Corn Muffins

Ingredients:
1 - 1-1/2 cup blueberries
1 box Jiffy corn bread mix
1 egg
1/3 c granulated sugar
1/2 cup milk

Directions:
  • Mix cornbread mix, egg, sugar, & milk in a bowl and set aside - I sometimes do this before dinner, and then do the remaining steps after dinner
  • Preheat oven to 400°
  • Coat muffin pan with cooking spray
  • Place 3-4 blueberries in each (of 12) muffin cups
  • Dollop 1 tbsp of batter in each tin
  • Repeat with another layer of blueberries, more batter, and more blueberries
  • Bake for 12-15 minutes
  • Cool on a wire rack.
  • Once they are cool enough to handle, take them out of the pan and put them "upside down" (which now becomes "rightside up") on the wire rack to continue cooling
  • When ready to serve (OK to serve warm), place on a plate and dust with confectioners' sugar and/or whipped cream

Wednesday, June 4, 2008

Salsa!

Sam recently posted her salsa recipe, and as she said, the recipe is a very rough guideline and open to a lot of improvisation. This time was the closest I've ever made it to her actual recipe. In the summer, typically go to the farmer's market and get whatever tomatoes and hot peppers look best that week (I don't like tomatoes unless they're ripe). Sometimes this means heirloom tomatoes (very sweet and juicy), sometimes I roast the hot peppers (poblano peppers seem to work well in this regard), sometimes I add in bell peppers, etc. Black beans and/or corn are also nice additions. Here is this week's attempt:


and a close up...


looks pretty good, eh? I heap this stuff on my tortilla chips - a lot more than I can say for store-bought salsa. The recipe below reflects what I did this time...

Sam's Salsa
Ingredients:
4 medium tomatoes, seeded
2 cloves garlic
1/2 red onion
1 serrano pepper, seeded
1 jalepeƱo pepper, seeded
juice of one lime
Fresh basil leaves
Fresh ground pepper and Kosher salt, to taste

Directions:
Chop ingredients, and combine. Chill for at least an hour to let flavors co-mingle.

Tuesday, June 3, 2008

Black Raspberry

Two weeks ago, Z had a work-related event at the Winking Lizard, and at it, she discovered a drink on their menu - the black raspberry. A black raspberry is basically a black and tan except in place of the Bass is a framboise lambic (a beer fermented with raspberries). At the Winking Lizzard, it is Lindeman's lambic, but Grapes of Mirth was out of their framboise, so I got another brand (which I liked just as much, although Z likes Lindeman's better because it is sweeter). To make the drink, I filled a pint glass half full with lambic and then, pouring the Guinness over the back of a spoon to prevent mixing, I layered the Guinness on top of the lambic. You can't see too well in this picture, because both of the beverages are relatively dark, but I was successful at creating the layered look (at least when held up to the light).


The drink turned out very well, and we've since bought a bottle of Lindeman's Framboise to help finish off the supply of Guinness with more of the same...

Monday, June 2, 2008

Herbed Focaccia Bread

A few weeks ago, Sam invited us over for a BBQ, and suggested I bring homemade bread. Now, for something like a BBQ, I figured a "finger food" would be best, and when it comes to bread-themed finger foods, slices of focaccia seemed to fit the bill.

The focaccia recipe is a variation on my pizza recipe (both adapted from the Bread Bible). The pizza recipe is HERE. For making the focaccia, I typically start the dough with about 2+ cups of water and add the other ingredients to match with this. Then, after I've had the dough rise in a bowl for 90-minutes, I shape it into (relatively thick) rounds or into a large rectangle (on a lightly greased jelly roll or similar shallow baking pan sprinkled with corn meal).

I then cover it again to let rise about 40 more minutes. Then, using my fingers, I poke indentations throughout the dough and spread an oil and herb mixture on using a spoon. The bread then bakes for 20-25 minutes at 400 (for small rounds or up to 40 minutes for a larger rectangle). As soon as it is done, I sprinkle it with kosher salt.

For the oil, which is the real flavor of the bread, I mix a third of a cup (or so) of olive oil and add in freshly chopped garlic (2 cloves) and rosemary (2 sprigs), but you can easily adapt this to suit your tastes (I've sometimes used basil, thinly sliced red onions, etc.). I typically prepare the oil when the dough is rising the first time so that the oil will be saturated with flavor. The finished produce looks something like this:


Sliced into smallish pieces, this makes great finger food, and it is full of flavor. It is one of my favorite things to bring to pot luck dinners or when having guests over for appetizers/wine.