Saturday, September 5, 2009

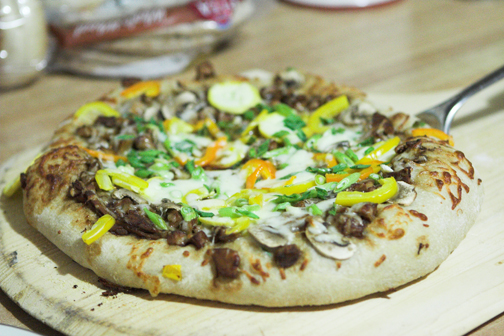
Asian BBQ Pizza

This recipe is one I made up one day as a way to get rid of extra dough and extra chicken I had laying around. I didn't have a lot of other ingredients, so the original version was much simpler than the one picture below, and I think it was actually quite a bit better (I only had a little dough that time, so I had a thinner, crisper crust).

One technique I learned from an earlier pizza attempt was to use a slotted spoon to get the sauce onto the pizza. Since the sauce is very thin and watery, if you are not careful, you can end up with a pool of liquid in the middle of the pizza. So, by using a slotted spoon, I was able to get all the meat and enough of the sauce to impart flavor, but not so much as to have a watery mess.


Asian BBQ Pizza

Ingredients:
1/2 small roasting chicken (legs and thighs), diced
1/4 cup hoisin sauce (Chinese BBQ sauce)
1/4 cup soy sauce
1 tbsp honey
2-cloves garlic
1-tsp ginger
dash of cayenne pepper
pizza dough
mozzarella cheese
toppings of choice (green onions or thinly sliced red onions, peppers, zucchini, baby corn, etc.)

Directions:
  • mix all ingredients above dough in a bowl and marinate for 2-hours
  • Preheat oven to hottest setting with baking stone if available
  • Using a slotted spoon, ladle the sauce / chicken mixture onto pizza
  • add toppings and cheese
  • bake until cheese is melted and starting to brown (5-10 minutes depending on heat of over and thickness of crust)

Sunday, August 30, 2009

Lemon Dijon Pasta Salad

Last month, a friend graduated with his PhD in economics. For the celebration picnic, I brought pasta salad. Now, to be honest, for most of my previous pasta salad attempts I've simply used Italian dressing and store-bought pasta salad seasoning. However, because this was a special occasion, and because I had plenty of lead time, I decided to put in a bit more effort (although not as much as I'd expected!), and made a pasta salad completely from scratch. I found a great resource to do this at allrecipes.com, with their 5 steps to perfect pasta salad.

They offer general guidelines that you can follow to create a nearly infinite range of pasta salads. In order to prevent duplicating their method, I simply refer you to their page above, and list the ingredients I used for my creation below. It was, by far, the best pasta salad I've ever made, and was extremely easy as well.


Lemon Dijon Pasta Salad (for instruction, go here)

Ingredients:
  • 1-lb box, rotini
  • 1-lb cherry tomatoes, halved
  • 1/3-cup pine nuts, roasted
  • 3/4-red, yellow, and/or orange bell pepper, diced
  • 2-green onions, cleaned and sliced
  • 8-12 basil leaves, sliced
  • 1/4 cup shredded Parmesan cheese, plus more to garnish
For the dressing, I followed this recipe, using lemon juice and Dijon mustard. Instead of using a wisk, I used our blender to mix it all up.

Friday, July 10, 2009

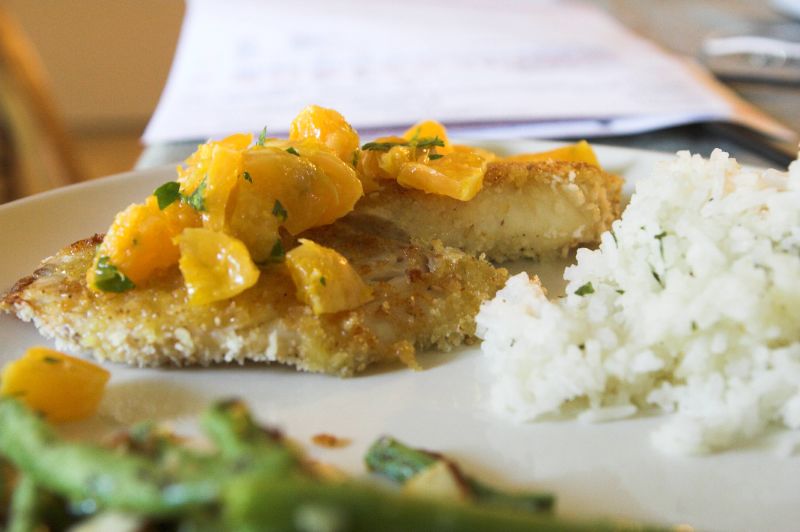
Panko breaded tilapia with orange salsa

A few weeks ago, we tried a recipe for roasted tilapia with and orange parsley salsa (recipe here). The basic idea was good, we thought, but the fish was too bland. So, to make it a little more interesting, I breaded the fish, and tried to incorporate some of the flavors from the salsa into the fish. The end result, as you can see, looks delicious, and tasted much better than the original, without much added fat.


For the fish:

Ingredients
2 tilapia filets
1/2 cup milk
~3/4 cup panko bread crumbs
1 tbsp sesame seeds
1/2 - 1 tsp orange zest
salt and pepper, to taste
1 tsp light oil

Directions
  • Preheat oven to 400°
  • Mix dry ingredients in a shallow bowl
  • Heat oven-safe frying pan over medium high heat
  • Dip fish filets in milk and then coat in breading
  • Fry fish on one side until golden brown, approximately two-minutes
  • Flip fish and transfer pan to oven - bake for 8-10 minutes longer, until fish is flakey
  • Serve with rice and salsa (link above)

Sunday, May 31, 2009

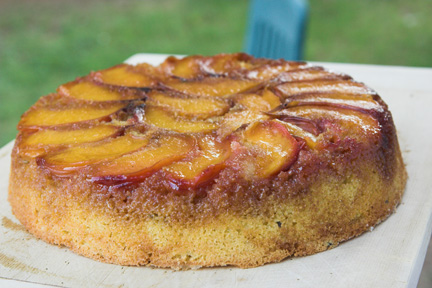
Peach Upside Down Cake

Since we apparenlty love cornbread-related desserts, Z and I this week made a Cornmeal and Peach Upside Down Cake from Martha Steward (recipe here). We thought it was very delicious, although with a stick and a half of butter, it was certainly not healthy! I followed the recipe exactly (baking is not normally my strength, so I don't like to take too many chances!), but I will make some minor changes next time. Specifically, the recipe calls for too much butter to be melted in the cast iron skillet to form the top-crust/cook the peaches, at least for the size skillet we have. If you make it yourself, I'd suggest starting with about half the butter, and melting it, and, based on how thickly it coats the bottom of the pan, you can add more until it seems like an appropriate amount for your skillet.

Thursday, May 21, 2009

Grilled asparagus and onion pizza / chicken marsala pizza

I have to start by apologizing to my loyal reader for not posting in quite some time. Before Z was here (permanently), I was very busy, and now that she is, I've just been lazy about blogging (or have been using previously-blogged recipes).

My most recent new recipe was taken from the May issue of Cooking Light, and is a grilled pizza. Because I followed the recipe pretty much exactly as published, I'll simply direct you here for the recipe from Cooking Light. Instead of using store bought dough, I made my own (recipe here) using my wonderful stand mixer. When making dough, I have to say that the stand mixer makes a huge difference - it is willing to knead it a lot longer than I am, and as such, I get the gluten to set up much better than when I knead by hand.


With the leftover dough, I made a chicken marsala pizza, inspired by a similar one my friend Mike made. The pizza-making was similar to this one, except that the topping/sauce was different. I thinly sliced one chicken breast and tossed it with flour and spices (oregano, salt, pepper) and then browned it in olive oil. I added in half an onion and several mushrooms (both sliced) and 1 clove of minced garlic and sauted for a while, before adding in 1/2 cup (plus) of marsala wine along with more spices (oregano, basil, pepper). I simmered until it reduced a bit, and added 1 tbsp of butter. I added a little beef broth if it boiled down too much, as I was waiting for Z to get home before I put the pizza together.

Thursday, March 12, 2009

Portabella Parmesan

Here is a recipe for Portabella Parmesan we've enjoyed a few times. I don't exactly remember where we found it (food network, probably, so perhaps Giada?), but it has consistently been an easy and tasty dish.

before the oven (with good lighting) ...


Ready to serve


The top view


Portabella Parmesan Ingredients:
Portabella caps (1 per person)
Olive oil (1 tsp / mushroom)
Salt & Pepper
Pasta sauce
Mozzarella cheese
Butter (1 tsp / mushroom)
Parmesan cheese

Directions:
  • Clean mushrooms with a damp paper towel
  • Brush mushrooms on both sides with olive oil, sprinkle with salt and pepper to taste
  • Grill mushrooms, 3-5 minutes per side
  • In a shallow baking dish, coat with pasta sauce
  • Place mushrooms, vent side up (i.e., upside-down) in baking dish
  • Add sauce to mushroom caps (enough to coat with a thin layer)
  • Sprinkle mozzarella cheese to cover mushrooms, add butter, and sprinkle Parmesan cheese
  • Bake at 400° for ~15-minutes (until cheese is browned)
  • Serve with pasta

Monday, February 2, 2009

Honey-Jalapeno Chicken

Yes, yes, I've been a bad blogger lately. Only one post in all of January and, I'll be honest, February isn't looking much better. However, I do have some cooking to report at least.

My latest cooking attempts was a recipe that Sam suggested (which can be found here). This is an Asian-inspired chicken and pasta dish that came out wonderfully. It had a good balance of sweet and spicy and was very simple to make.


Honey-Jalapeno Chicken

Ingredients:
12 ounces soba noodles (could not find them, and forgot to go to Asian grocery store, so I used whole wheat spaghetti)
1 jalapeno, seeds removed
1/3 cup honey
1/4 cup chopped fresh cilantro leaves
1/2 teaspoon salt
1/2 teaspoon ground black pepper
2 to 3 tablespoons water
2 teaspoons olive oil
1/2 rotisserie chicken, shredded or sliced
3 tablespoons soy sauce
2 teaspoons sesame oil
1/4 cup chopped scallions, green part only
2 tablespoons pickled ginger, minced

Directions
  • Cook soba noodles according to package directions and drain
  • Blend jalapenos, honey, cilantro, salt and pepper and puree. Add 2 to 3 tablespoons of water to the mixture until desired consistency is achieved
  • Heat olive oil in a skillet
  • Add the shredded chicken and sauce and cook until heated through
  • In a medium bowl, toss cooked soba noodles, soy sauce, sesame oil, scallions, and pickled ginger, then transfer to serving bowl
  • Pour heated chicken and sauce over noodles

Sunday, January 4, 2009

Pecan Rice Pilaf

Several posts ago, I made a rice pilaf that was generally good, but was somewhat lacking in flavor. Because of this, I've been hoping for an opportunity to try the recipe again with some modifications. When I was invited to a potluck recently, and heard that most of the dishes were "main course" options, I jumped at the opportunity. Because a friend recently gave me a bag of fresh pecan's from her tree, I decided to incorporate those as well.

I liked the method that I used previously (adapted from Good Eats), so I used the same approach. As you can see below, I added the pecans after the dish was done cooking. However, I wanted the flavor of the pecans to be more prominent than that, so I tried something new. I steeped some ground pecans in the broth for about an hour before I started cooking with the hope that the broth would take on the flavor.


Delicious!

Because the potluck was relatively small, I had plenty of leftovers. One time, I tossed in some dried cranberries after reheating the pilaf in the microwave, and though the flavor worked well with the dish.


Pecan Rice Pilaf

Ingredients:
2 tbsp butter
1 tbsp olive oil
2-3 cloves garlic, minced
1/2 onion, minced
1/2 c carrot, minced
1/2 c mushrooms, minced
garlic powder, kosher salt, and pepper, to taste, plus a dash of nutmeg
2 cups long grain rice
3 1/3 c chicken broth (I only used 3 c, and that did not seem to be enough)
1 bay leaf
1/2 c pecans, roasted and minced, plus 1/4 c finely ground

Directions:
  • Mix broth with ground pecans and let sit on counter for 1 hour
  • Preheat oven to 350°
  • In a heavy, wide, lidded pan, melt butter over medium-low heat
  • Add garlic, onion, carrot, mushrooms, and salt, sweat until aromatic, stirring constantly
  • Add olive oil
  • Add rice and stir to coat and rice begins to smell nutty
  • Add chicken broth, pepper, and nutmeg, and bay leaf & bring to boil
  • Cover pan with moistened dish towel (or tea towel). Place lid on pan and fold towel corners over lid
  • Bake for 15 minutes
  • Rest at room temperature for 10 to 20 minutes without removing the cover.
  • Remove lid from rice and turn out onto a platter
  • Fluff with a large fork and add roasted pecans (I roasted the pecans for ~ 10-minutes while the pilaf was cooking in the oven)

Monday, December 22, 2008

Bacon-Braised Brussels Sprouts

Since Z is not currently here, I have been trying fewer main course meals lately, and more side dishes. Also, since there are some foods she doesn't like, I've been making dishes I wouldn't be able to make with her in town. In particular, earlier this month I made a bacon-braised Brussels sprout recipe. This was a Tyler Florence recipe I found here, and it was pretty easy.


First, for those of you who are not familiar with Brussels sprouts, they are like miniature cabbages that grow on a club. I was shocked that the local grocery store sold them by the club, so I succumbed to temptation, and bought this beauty here.


It was a bit more work than buying the pre-cleaned, bagged Brussels sprouts, but I got it anyway for nostalgia's sake (we always had these in our garden when I was growing up).


This is what the pan looked like when done

Served with a citrus herb marinated chicken breast


Bacon-Braised Brussels Sprouts

Ingredients:
1 club of Brussels sprouts
1/4 lb bacon
1 garlic clove, additional garlic powder (I only had one clove!)
dried thyme (I didn't have fresh)
1-1/2 cup chicken broth (I added gradually, 2 cups seemed like too much)
Salt & pepper
3 tbsp balsamic vinegar
1-cup panko bread crumbs
1/4 cup grated Parmesan
2-sprigs rosemary
Olive oil

Directions:

  • In a large, oven safe pan and over medium-high heat, cook bacon for 2 to 3 minutes
  • Add the garlic clove, thyme and Brussels sprouts and cook until slightly caramelized, ~4-5 minutes
  • Add chicken broth and reduce heat to a simmer
  • Season with salt and pepper, cover and simmer for 12 to 15 minutes
  • Remove lid and add a splash of vinegar and reduce until syrupy, 2 to 3 minutes
  • In a bowl, toss bread crumbs with rosemary, thyme leaves and garlic powder, then drizzle with a little olive oil, salt, and pepper
  • Sprinkle bread crumb mixture and Parmesan over Brussels sprouts and bake in a 350°oven until golden and crispy.

Saturday, December 20, 2008

Arizona

For Thanksgiving, we visited Z's parents in Arizona. With the trip, came good times, good pictures, and good food.

Here, for example, would be an example of good times.

I know the white balance is off, but Z's mom is clearly cracking up over something (and the sky looks pretty cool too)

We took some pictures of an Arizona sunset, which came out fairly well. Keep in mind, these are my first sunset pictures. All-in-all, I'm pretty happy with them, but will happily take advice on how to make them better.


I think this one is my favorite.


While we were there, we came across some products of a local jam and sauce maker. I've been looking for a jalapeƱo jelly for Z for a while (ever since she had jalapeƱo jelly with brie at a wine bar in Lubbock), so when I saw that this vendor carried some, I pulled her over to try it out. She liked it, so I got some. I also grabbed a bottle of a raspberry chipotle sauce.


I used it as a pork marinade. In all honesty, I was disappointed, but that could be because I didn't have time to actually marinate the meat, and instead just put it on right before baking. The sauce was really good to dip the meat into, so it will definitely get another chance in my kitchen.


Saturday, November 22, 2008

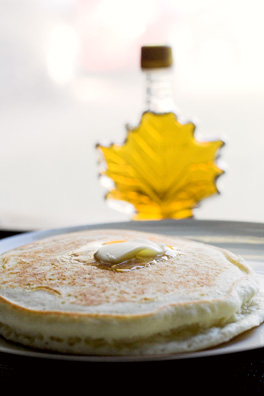
Pancakes

Ok, this was totally from a mix, but doesn't it look good?

The Yard

This post definitely isn't food related, but ah well. One thing I like about the place we're renting in Lubbock, is the spacious back yard. It turns out that the dogs like it too.

Here's Nizhoni trying to scratch her back (or something)

this went on for quite some time


And here Nizhoni and Kodiak are playing with each other. This picture isn't great because it is through the window and there was a big light differential. However, I was really impressed that they were play fighting without one of us watching them directly.

Yes, Nizhoni looks a lot smaller, but she can definitely hold her own

Thursday, November 20, 2008

Honey Curry Squash

I remember liking squash as a kid, but haven't had much luck myself making squash that actually enjoyed (not winter squash, at least). So, wanted to instill variety in my vegetable repertoire, I compelled myself to buy an acorn squash last week, and decided to try a few things out. The recipe below is the one that is definitely worth sharing with you, my loyal readers (AKA Z and her mom).

This recipe I got from this month's Cooking Light magazine. It turned out very well, and will definitely be one I put into a regular rotation. I tweaked the recipe based on what I had (and the fact that I was cooking for one), but didn't make any huge modifications.


Honey Curry Squash

Ingredients:
1/2 acorn squash, cubed
1 tbsp olive oil
salt and pepper, to taste
golden raisins (not sure how many I used - I added them until it "looked right")
1-2 tbsp honey
curry powder and cayenne pepper, to taste

Directions
  • Toss squash cubes with olive oil, salt, & pepper
  • Bake at 500° for 15-20 minutes, or until tender
  • Toss remaining ingredients and serve
(see, I told you it was simple)

Wednesday, November 19, 2008

Rice Pilaf

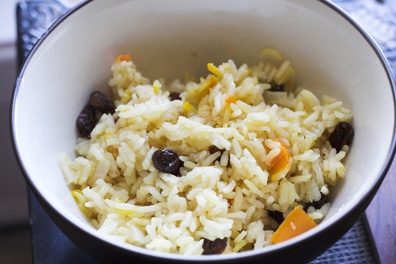
I'd always wanted to try making a rice pilaf. I mean, it seemed so simple - rice, some sort of seasoning, and perhaps a vegetable or two. However, whenever I tried an "impromptu" (i.e., without looking up a recipe) pilaf, I failed miserably. Then, one day while watching Good Eats, I saw Alton Brown make a rice pilaf that seemed remarkably easy. So, last month, when Z was here and I was therefore cooking and blogging more regularly, I thought that it would be a great time to try making a pilaf. Alton's recipe was remarkably easy, although it was not super flavorful. I'm not sure exactly what I'd change (more garlic, perhaps, or some pepper), but it is something I will certainly play around with.


Rice Pilaf
adapted from Good Eats

Ingredients:
2 tbsp butter
1/2 onion, minced
1/2 red bell pepper, minced
2 pinches kosher salt
2 cups long grain rice (I used jasmine rice)
2-3/4 c chicken broth
1/2 tsp orange zest
Pinch of saffron strands, steeped in 1/4 cup hot water
1 bay leaf
Golden raisins for garnish

Directions:
  • Preheat oven to 350°
  • In a heavy, wide, lidded pan, melt butter over medium-low heat
  • Add onion, pepper, and salt, sweat until aromatic, stirring constantly
  • Add rice and stir to coat and rice begins to smell nutty
  • Add chicken broth, orange zest, saffron and water, and bay leaf & bring to boil
  • Cover pan with moistened dish towel (or tea towel). Place lid on pan and fold towel corners over lid
  • Bake for 15 minutes
  • Rest at room temperature for 10 to 20 minutes without removing the cover.
  • Remove lid from rice and turn out onto a platter
  • Fluff with a large fork and add raisins

Monday, October 27, 2008

Lemon Blueberry Frozen Yogurt!

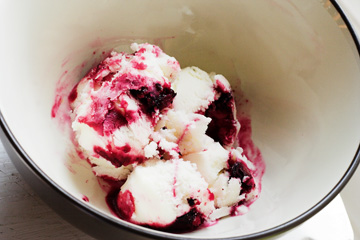
A few months ago we heard that Food and Wine magazine did a profile of Columbus local ice cream maker, Jeni. The recipes that Jeni submitted sounded great, but we did not have any way of making ice cream. Now that we have an ice cream attachment (thanks Jay and Sonja) for our stand mixer (thanks Joyce and Don), however, we decided to try making lemon blueberry frozen yogurt. This yogurt was absolutely delicious! A great combination of rich (from the dairy) tart (from the lemon) and sweet (from the fresh blueberry syrup). We put it in our deep freeze, and might have gotten in too frozen, but it becomes much more scoopable after a minute of two on the counter.

The "batter" in an ice bath

Churning away...

Finished product!


Lemon Blueberry Frozen Yogurt
Recipe from Jeni

Ingredients:
1/2 cup fresh lemon juice, plus 1 tablespoon grated lemon zest
1/4-ounce package unflavored powdered gelatin
2/3 cup plus 6 tablespoons sugar
1/4 cup light corn syrup
2 cups plain whole-milk yogurt
1/2 cup heavy cream
3/4 cup blueberries
2 teaspoons water

Directions:
  • Fill a large bowl with ice water. Pour 2 tablespoons of the lemon juice into a small bowl. Sprinkle the gelatin over the lemon juice and let stand for 5 minutes.
  • Meanwhile, in a small saucepan, whisk the remaining 6 tablespoons of lemon juice with 2/3 cup of the sugar and the corn syrup. Bring to a boil and cook over moderate heat until the sugar dissolves, 1 minute. Remove from the heat and stir in the lemon gelatin.
  • In a medium bowl, mix the yogurt with the zest. Stir in the lemon juice mixture, then whisk in the cream. Set the yogurt base in the ice water bath and let stand, stirring occasionally, until cold, 20 minutes.
  • Meanwhile, in a saucepan, mix the blueberries with the remaining 6 tablespoons of sugar and the water. Simmer over moderate heat, until saucy, 4 minutes. Let cool.
  • Pour the lemon yogurt into an ice cream maker and freeze according to the manufacturer’s instructions.
  • Scoop alternating spoonfuls of the yogurt and blueberry sauce into a plastic container. Press a sheet of plastic wrap directly onto the surface and close with an airtight lid. Freeze until firm, about 4 hours.

Sunday, October 26, 2008

Chicken Marsala

This recipe was largely stolen from a Tyler Florence recipe, and was very easy to make. I was generally happy with the outcome, but might do some things differently in the future. In particular, in this recipe, the chicken is only in the sauce for a brief period of time, not allowing much of the Marsala flavor to penetrate the chicken. In the recipe below, instead of removing the chicken, perhaps I'd simply add the bacon and mushrooms when I flip the chicken (I cooked it for about 5-minutes per side), and then continue from there. It would mean that the chicken was in the pan for as long as the Marsala was, and hopefully this would mean deeper flavor distribution.

On another note, this was our new braiser's first run, and I was generally happy with it. At first, when I was cooking the chicken, I was afraid it would burn the chicken too much or be horrible to clean. This ended up being a non-issue. The wine helped to quickly dissolve any cooked on residue (further flavoring the sauce) far better than it has on any other pan I've used.

Our beautiful new braiser (thanks Priscilla & Paul)

The chicken cooking

Looks pretty good, eh?

After cooking the bacon and mushrooms, add in the wine

At the end, the chicken gets added back in

And served over pasta (in our new pasta bowl, thanks to Kim and Evan)


Chicken Marsala

Ingredients:
4 chicken breasts
1/4-1/2 c flour
salt & pepper
1/4 c olive oil
2 strips of bacon, cut into small pieces
1/2 lb mushrooms, halved
1/2 c dry Marsala wine
1/2 c chicken stock
2 tbsp butter
1/4-1/2 c heavy cream

Directions:
  • Pound chicken breasts flat with mallet ("meat hammer")
  • On a plate, season flour with salt and peppper
  • Heat oil in a large skillet, over medium-high heat
  • Dredge chicken in flour and fry until done, about 5-min per side, depending on size (and flatness) of chicken
  • Remove chicken from pan
  • Add bacon to pan & saute briefly over medium heat
  • Add mushrooms & saute until mostly cooked, about 5 minutes
  • Add Marsala wine & bring to boil, add chicken broth. Salt and pepper to taste
  • Simmer for a minute or more to reduce sauce
  • Add butter & cream, return chicken to pan & heat for another minute
  • Serve over pasta or mashed potatoes

Sunday, October 19, 2008

Delicious steak!

So, as many of you know, I got married last weekend. With weddings, comes gifts. Of course, many of the things we registered for were kitchen-related, and probably because everyone knows of my predilection for cooking and Z's predilection for eating, most of the kitchen-related items were purchased. Today, we (yes, WE - as in Z and I were in the same state!) started enjoying these new kitchen items, with a steak dinner. We had pan-seared strip steaks with a red wine reduction (recipe stolen from here), taking advantage of our beautiful, high quality (at least for us), non-stick cookware (thanks Rich). We also had oven-baked seasoned potato cubes and grilled vegetables. This was all served on our beautiful new dinnerware (thanks Jenny & Dominic, Shirley & Joyce, Rick, Betty, and family) and eaten with our sturdy new silverware (thanks mom & dad D). We also had wine served from our new decanter (thanks Katie). Of course, since the place is a total mess (although rapidly improving), this wonderful meal was eaten from our futon on a coffee table. This is what the meal looked like:


the lighting was horrible for this picture


Pan Seared Steak and Red Wine Reduction

Ingredients:
Strip steak, 3/4 inch thick, warmed to room temperature(ish)
3 tbsp olive oil
1/4 tsp galic powder
1 tbsp herbes de provence
1/4 tsp kosher salt
pinch of cayenne
black pepper to taste

1 shallot, minced
1 clove garlic, minced
1/2 tsp flour
3/4 cup red wine

Directions:
  • Mix top ingredients (minus steak) on a large plate
  • Place steak onto herb mixture and coat both sides
  • Preheat large skillet over medium heat, add steaks
  • Cook steaks ~4-minutes per side
  • Remove steaks and let rest
  • Add shallot and garlic to pan and saute briefly
  • Add flour, to form a roux
  • Add wine, making sure to loosen any meat/herb remains
  • Simmer on medium heat to reduce liquid, until desired consistency is obtained (can add more wine or stock to thin out the reduction, add more flour or cornstarch to thicken)
  • Drizzle reduction over meat and enjoy!

Tuesday, October 7, 2008

New Camera

Now that I have a new camera, I've begun playing around with it. Mostly, I've been shooting mundane objects, such as my watch (on a table), or blurry objects like Nizhoni quickly approaching me. However, last night, when I was mowing my yard, I noticed something odd about a pine(ish) tree in the front yard. From a distance, it looked sorta like it had dew on it.


However, upon closer inspection (i.e., when I had to mow under the tree), I noticed that it has these little purple berry sort of things.


Now, I know this isn't food, but I was curious if anyone knew the variety of this tree?

Monday, October 6, 2008

Quick Beef Stew

Well, well, well... a paycheck comes, and with it (not literally) a new camera. To celebrate my new picture-taking device (that I'm gradually learning how to use) I decided to cook a meal that has not yet been blogged about. Actually, I've made this dish a few times in the past month. It started when I had some frozen sirloin that I wanted to do something with. So, I looked up recipes online, and found several I liked. The one I am presenting (that I'm calling "quick beef stew") was largely inspired by a Rachel Ray recipe, but was modified slightly based on what I had in the kitchen (and felt like doing). Since I've made it a few times now, I've tried several different variations. I'm presenting the one I made this time, but it can certainly be tweaked to suit your needs.

The cast of characters

Since I was only cooking for myself, the amounts below would need to be adjusted to suit most situations. This is probably enough to satisfy two adults (I had leftovers with a little extra after that.

After adding the wine, but before the broth (I think)


The finished product


Quick Beef Stew

Ingredients:
1/2 lb beef sirloin, cubed
1-clove garlic, minced
4-5 mushrooms, sliced (I did relatively thick slices)
1/2 red onion, cut into large cubes
2-slices bacon, cubed
red wine
broth (I used chicken)
1-2 tbsp. flour
salt, pepper, & "other spices" to taste

Directions:
  • Saute bacon over medium heat until cooked; remove bacon, keep bacon grease
  • Raise heat to medium high and brown beef (in the bacon fat)
  • Add garlic, mushroom, and onions. Saute until "sweaty"
  • Add flour, stirring regularly to create a paste (less than 1-minute)
  • Add red wine (1/2+ cup ), and stir, until a thick gravy forms
  • Add back bacon pieces; add salt and pepper and other spices (I used herbes de provence this time, but have also used just rosemary and thyme, and to be honest, it would probably be fine with just the salt and pepper).
  • Add broth until slightly thinner than your desired consistency
  • Simmer, covered, for about 20-minutes
  • Serve over noodles or mashed potatoes

Wednesday, October 1, 2008

A treatise on marinades

Well, while I'm in the picture-less world that I currently live in, I figure I can write something cooking-related that does not require pictures. Specifically, I'd like to provide a few guidelines I've observed and employed when marinating meat (you marinate something, the something you marinate with is a marinade). I've been meaning to do something along these lines for a while, so I figure why not now?

What is a marinade? A marinade is basically a flavor-inducing liquid, that can also tenderize or alter the texture (e.g., by caramelizing) of the final product. They can be used for grilling (my preferred application), baking, braising, stewing, steaming (in the case of fish) frying, or virtually any food preparation technique. However, certain marinades lend themselves to some preparations more than others. For example, a sugary marinade that is likely to caramelize when heated might be better suited for the grill or oven than for a pan-fry preparation (at least for thicker cuts of meat that would need to be fried for more than a few minutes).

What's in a marinade? Well, it depends, really. Marinades almost always have some sort of an acid, but the other ingredients can vary widely. Below are some of the more common elements I've noticed in marinades.

Acid: Adds flavor and helps with tenderizing the meat. Examples include citrus juice, vinegars, or alcohol (typically wine). Depending on the style of food, different acids might be appropriate. For example, with for stir-fry or other Asian-inspired marinades, I often use rice wine vinegar or lemon juice (note - a stir-fry sauce can sometimes be a marinade recipe with corn starch added for thickening (added at the end of cooking)). For Mexican dishes, I often use lime juice. For Italian, I often use balsamic vinegar (go lightly - it packs a lot of flavor) or lemon juice. If you're planning to de glace a meat dish using wine (e.g., when making stew), using some of the wine in the marinade is a good choice.

Fat: Perhaps not as essential as an acid, fats can still be very important in a marinade. This is because some flavors (see below) are not water soluble, and instead need to be carried into the meat by a fat (e.g., capsaisin - the spicy ingredient in hot peppers). I typically use either a neutral oil that can withstand high heat (many vegetable/grain oils qualify) or an oil that can itself impart some flavor (e.g., olive oil). The choice depends on the specific type of food (e.g., you probably wouldn't use olive oil for a stir-fry) as well as the cooking method (if you're going with a high-heat cooking method, it may be best to use an oil that can tolerate high heats).

Flavor: When it comes down to it, a marinade is often defined by the flavorings that are added. Sometimes I use combinations of herbs and spices that are tried and true (e.g., herbes de provence) and sometimes I get creative. Herbs and spices are the most obvious flavorings, but others are important to keep in mind. For example, the vinegars and fats can bring a lot of flavor, as can things like garlic and ginger or other liquids you bring into the marinade (e.g., soy or Worcestershire sauce). If you are using a pre-mixed herb/spice combination (e.g., jerk seasoning, herbes de provence), be sure to get one that doesn't contain salt. Salt certainly helps to enhance flavors, but you can add that yourself. There's no sense paying a lot of money for a flavoring that contains salt when salt is available so cheaply on its own.

Sugars: Sugars can help enhance both flavor and texture. Sugars generally caramelize at high temperatures, which can be a good or a bad thing, depending on your goals. If you're afraid of burning the sugars, you can marinate the meat in a sugar-less marinade, and withold some of the marinade. Then, add the sugar of your choice, and brush it on the meat toward the end of cooking. Think BBQ sauce (which typically contains a sugar, such as molasses or brown sugar) - quite often it is best added towards the end of grilling to get a nice carmalized BBQ flavor, without charring on the grill.

Putting it all together: Make your marinade in a blender or food processor to fully integrate (i.e., emulsify) hydrophillic (water soluble) and hydrophobic (fat-soluble) ingredients and to chop up ingredients like garlic, ginger, green onions, hot peppers, and so forth. Marinate your meat in a plastic bag in the refrigerator (placed into another bowl to catch any leaks) for at least 30-minutes before cooking.

Remember that different combinations of these ingredients can result in wildly different flavors. I've used lemon, lime, and orange juices for Asian and Italian dishes alike, but different "flavors" and fats can distinguish the dishes. Feel free to be creative in combining flavors. For example, I made a stir-fry the other day that used rice wine vinegar, soy sauce, curry powder, cayenne pepper, and corn starch for the sauce that was very good. Adding cumin, garlic, and ground up jalepeƱo peppers to lime juice and soy sauce creates a classic tex-mex flavor. Pair flavors from similar regions of the world (e.g., French wine and herbes de provence, soy sauce, rice wine vinegar, and ginger).

Also, marinating is not just for meat. I will often marinate fruits and vegetables that I'm planning to cook on the grill (mushrooms, zucchini, asparagus, pineapple).